
I’ve been hired to travel all over the world to capture images for some of the world’s top brands. When on the clock for them, I lug my big, heavy, expensive Canon cameras everywhere I go – from Nashville, Richmond and Los Angeles to all corners of the globe.
However, when I’m not getting paid for my professional photography, I’m using my iPhone to capture life around me. Photography with iPhones has come SO far in the past few years; megapixels, various focal lengths, depth of field and editing range.
In this post, I’ll provide a high-level guide to iPhone photography. Continue reading to learn:
- All about photography with iPhones
- How to take professional pictures with your iPhone
- How to start photography with an iPhone
Photography With iPhones
About 99% of my Instagram account is iPhone photography and the number one question I get asked is “how do I take professional pictures with an iPhone?”
Photography is photography, fancy cameras are just nicer tools but not necessarily the best tool. Chase Jarvis said it best, “The best camera is the one that’s with you.”
ABT’s of iPhone Photography: How To Take Professional Pictures
iPhones have versatile, professional-grade cameras. That doesn’t mean your pictures will look professional right away. Photography is an art and you have to practice – iPhone photography is no different.
There are three key components that I call the “ABT’s of iPhone Photography” which I use to take professional-quality pictures on my iPhone. By reading and following the steps below, you can take photography on your iPhone to a new level.
A: Attention
What needs to have the full attention of the viewer? Fully focus on what you want viewers to see and equal effort on eliminating distracting elements. This is often done by moving your iPhone to adjust what is in the frame or behind the subject; poles, cars, colors, other people, etc.
Being able to select focus points, select depth of field and utilize focal lengths is crucial for guiding the viewer’s attention. Be sure to check out my iPhone Photography Tips post for technical tips and tricks.
iPhone Photography Example:
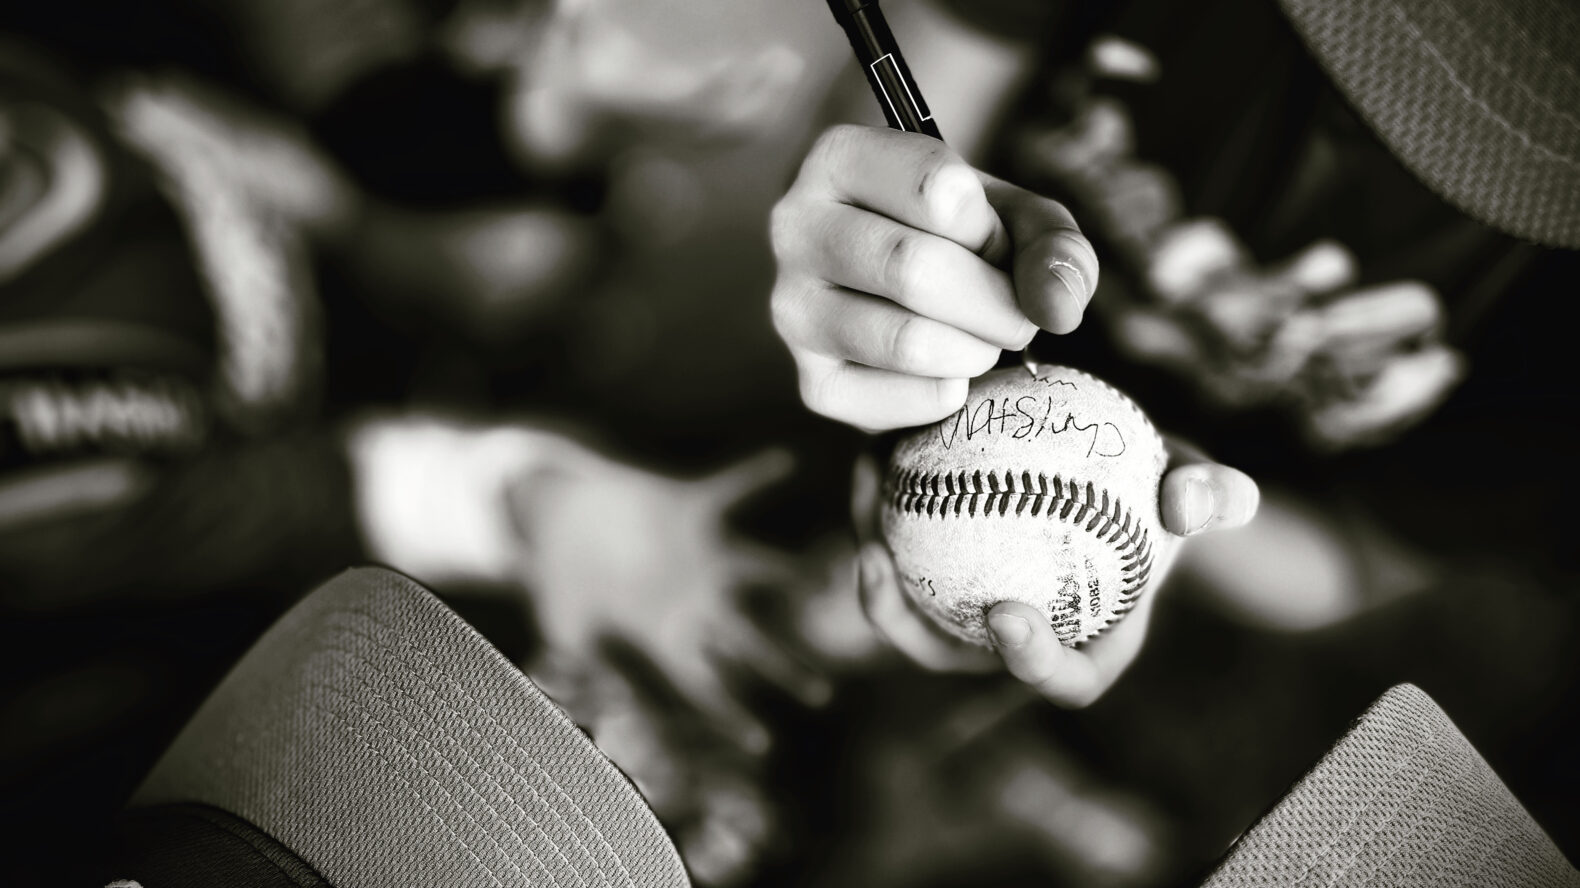
Using a higher angle and shooting down on the ball, I was able to eliminate the faces, fences, bags and any other distracting elements. I set my depth of field on 1.4 to ensure the other hands, feet, and the ground would be blurry and less distracting. All eyes on ball signing and nothing else.
B: Balance
Balance is in service of our first element (attention), but more specifically, it focuses on how we frame our subject with its environment and within the frame. Many photography guides talk about the rule of thirds but I tend to disregard it. I love symmetry and even cutting off (via framing) pieces of my subject that make the image more powerful.
I often tell early photographers, “crop with your feet.” In addition to stepping closer to the subject vs. zooming in, also think about how you can move the iPhone higher or lower or angle the iPhone to create a further balance of the subject (attention) within the frame.
iPhone Photography Example:
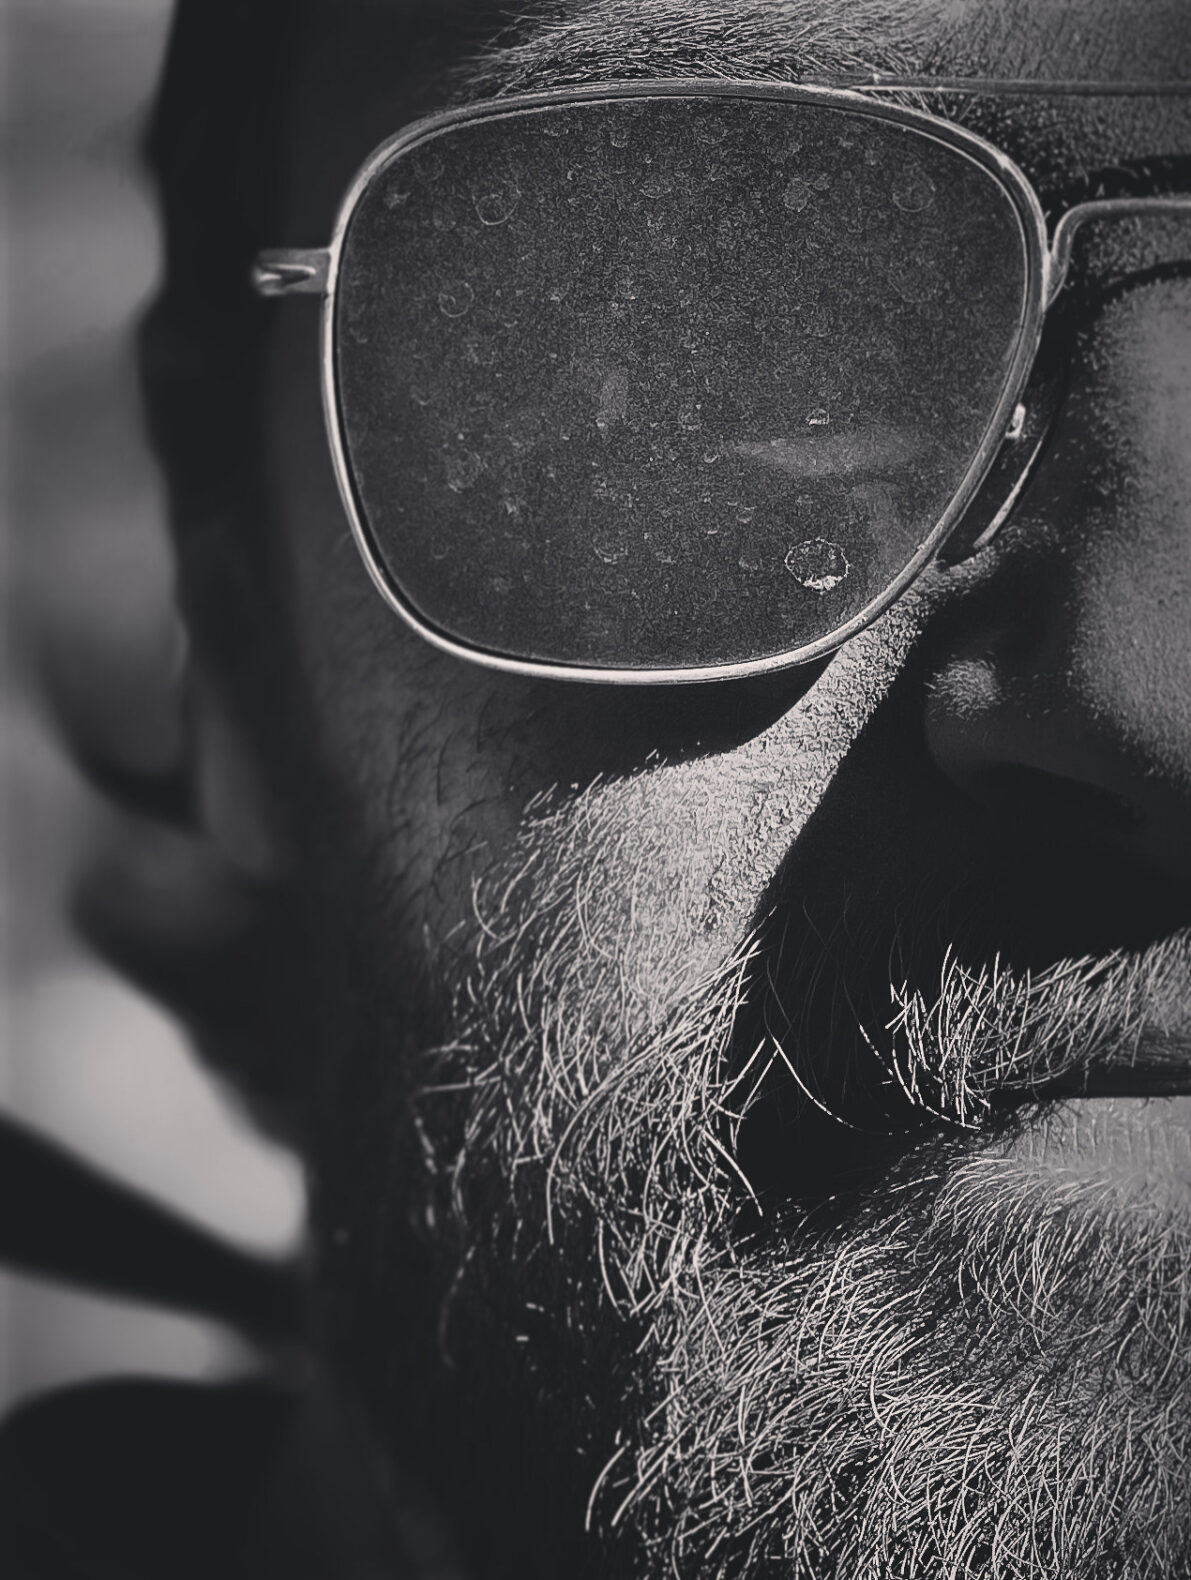
This image was taken as a full face image but as I got into the editing process, I realized I had to set the crop to only be half the face. This allowed me to balance the frame and not make it too crowded. It also brought attention to the dusty sunglasses, skin, and facial hair. I found a wider crop was unbalanced because his face was lit differently on the other side.
T: Timing
Sadly, there is no synonym for “timing” that begins with a “C,” I checked. However, timing is so crucial to iPhone photography that I allowed it to ruin my ideal “ABC’s of iPhone Photography” title.
Great images happen in an instant. A second before and after were completely different moments and framing. Timing can be done by predicting the movement of the subject and having settings locked so, at the exact moment, you simply push the capture button.
- iPhone Pro-Tip: Use the volume up button instead of pushing the red button on the screen. This allows you to watch the subject in real-life rather than looking at your iPhone to make sure you touch the small red button.
iPhone Photography Example:
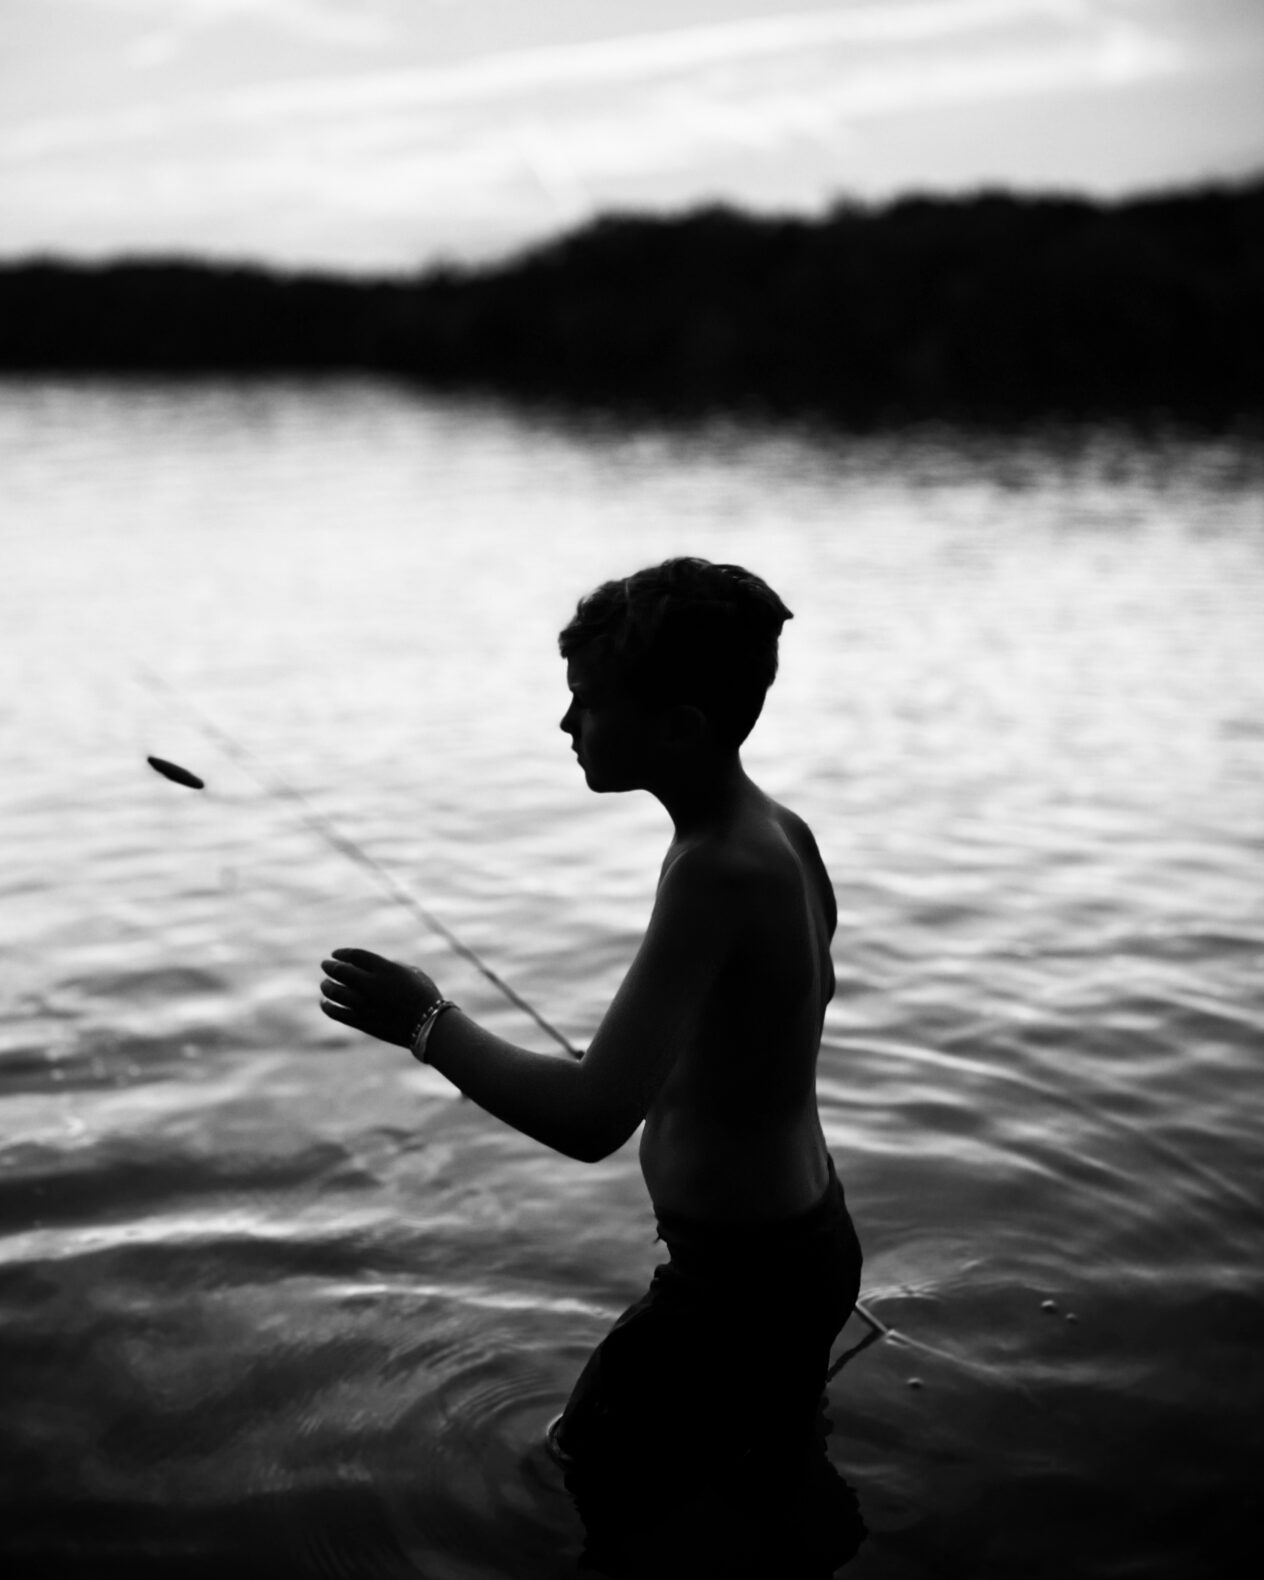
This is an image I framed in my iPhone, adjusted the exposure to be more silhouetted, then waited for the right moment. I knew the best image would show his side profile. Additionally, I wanted the fishing lure to be in focus with his face. Watching him cast I knew what to look for and when those elements would each happen at the same time.
How to Start Photography With an iPhone
I have several other iPhone photography tips and tricks that can help increase the quality of your pictures – but it starts with the basics.
As I mentioned before, it takes time and practice to achieve truly professional results in your iPhone photography. By concentrating on the ABT’s and consistently shooting, you’ll start to notice your pictures looking more professional! For more content about iPhone photography and other photography topics, be sure to check out my other blog posts.
Take Your Visual Brand To The Next Level With A Professional Photographer
If you’re a business, no matter how many posts you read you won’t be able to achieve the same level of professionalism as a corporate or commercial lifestyle photographer.
If you find the right photographer, they’ll provide a keen eye for framing and composition while incorporating your brand into each image. One photoshoot with a professional photographer equips you with an image library to use for marketing content, advertising, and visual branding.
Casey Templeton Photography is a professional business photographer based out of Nashville, TN, and serving the surrounding areas. Casey has years of technical practice behind the lens and experience in business branding across various industries and business sizes. To learn more about how Casey can take your brand to the next level, fill out our contact form.